About

My photo
This blog is a culmination of two forever-bakers who have spent countless hours reading about, thinking about, and dreaming about baking delicious treats in our spare time. After taking a few cake decorating classes, our interest has soared to no end. While living and working in the same city has been a sweet treat in itself, a move across the state has spawned the desire to keep in touch by taking our love of baking and everything kitchen to the next level. So wipe your feet on the mat and stay awhile!

Labels

Showing posts with label cake. Show all posts

Sunday, September 11, 2011

Baked Sunday Mornings: Caramel Apple Cake

First of all, this cake was delicious.  I had experienced it once already on the Baked book tour, and I even claimed it was the best frosting I'd ever had.  I, however, could not make it come together in my kitchen.  It was just one of those days.  The caramel separated the first time, and it was downhill from there.  But its still pretty tasty, despite the bumps in my road.  Yum!


{T}

Monday, May 23, 2011

Monster Cake!

Here's a little cake I whipped up last weekend for my sweet nephew Ethan's first birthday!  The birthday boy was covered in blue by the end of it!


{T}

Sunday, February 27, 2011

Baked Sunday Mornings: Devil's Food Cake with Angel Frosting

It's another scrumptious Sunday over at Baked!  This Devil's Food cake is pretty great.  The cake itself has cocoa, dark chocolate, and a little coffee to really bring out the flavors.  All of this goodness is enveloped in a seven minute frosting which the Baked boys dub "Angel Frosting."  I'm not the biggest fan of this kind of frosting, but it works well to cut some of rich chocolate flavor.  I think this chocolate cake recipe is a great base to build on...I'll definitely be using this again!


Head on over to the Baked Sunday Mornings blog for the recipe!

{T}

Sunday, February 13, 2011

Baked Sunday Mornings: Red Velvet Whoopie Pies

Just in time for Valentine's Day, we're baking Red Velvet Whoopie Pies this weekend over at the Baked Sunday Mornings group. If I had to describe these, I would say they were ruby-colored gems, sent down on a cloud from heaven. No doubt about it, these were good. Apparently the whoopie pie is the state dessert of Maine. They know what they're doing up there. These whoopie pies were soft and cakey with classic cream cheese frosting in the middle. If loving this dessert is wrong, I don't want to be right.


I can't wait to try these again! Head over to the Baked blog for the recipe and to see the other member's pies!

Friday, February 11, 2011

Tiramisu Cake

I have always had issues with tiramisu. It's crunchy, mushy, moist, and dry all in the same bite. It is a confusing dessert in my opinion. That being said, my husband always mentions two things when I ask him what I should make: tiramisu and creme brulee. I still haven't filled my kitchen torch with gas (or whatever it is that goes in there.....), and I think that he's probably okay with that considering I will most likely burn our house down. This cake is from Dorie Greenspan's Baking: From My Home to Yours, and it not only has brought me beyond my issues with tiramisu but has me addicted to the coffee marscapone icing. I will say this...there are a lot of steps. About halfway through I might have wished that I had just used a yellow cake mix, but at the end of it when tasting everything together I knew I had made the right decision sticking with it.


Tiramisu Cake
Source: Baking: From My Home To Yours

For the cake:
2 cups cake flour
2 tsp baking powder
1/8 tsp baking soda
¼ tsp salt
1 ¼ sticks (10 tablespoons) unsalted butter, room temperature
1 cup sugar
3 large eggs
1 large egg yolk
1 ½ tsp pure vanilla extract
¾ cup buttermilk


For the espresso extract:
2 tbs. instant espresso powder
2 tbs. boiling water


For the espresso syrup:
½ cup water
1/3 cup sugar
1 tbs. amaretto, Kahlua, or brandy


For the filling and frosting:
1 8-oz. container mascarpone cheese
½ cup confectioners sugar, sifted
1 ½ tsp pure vanilla extract
1 tbs. amaretto, Kahlua, or brandy
1 cup cold heavy cream
2 ½ oz. bittersweet or semisweet chocolate, finely chopped, or about ½ cup store bought mini chocolate chips

Preheat oven to 350 degrees. Butter and flour two 9 inch cake pans.

Making the Cake: In a bowl, sift together the cake flour, baking powder, baking soda, and salt. Set Aside. In a mixer, beat the butter on medium speed until fluffy, then add the sugar and beat for another 3 minutes. Add in each egg one at a time, beating after each addition for about 1 minute. Beat in the vanilla. Reduce the mixer to low and add the flour mixture along with the butter milk alternately, beginning and ending with batches. [Dorie suggests 3 batches of flour mixture and 2 of buttermilk] Pour the batter evenly between the two prepared pans. Bake for between 25-30 minutes (mine was done at 23 minutes), rotating the pans halfway through. They should be slightly brown on top and a knife inserted in the middle should come out clean when done baking. Transfer to a cooling rack. After cooling slightly flip over the pan to release the cake and allow to cool completely.

Making the Extract: Stir the espresso powder and boiling water together, set aside.

Making the Syrup: Add water and sugar to a small saucepan, heat until it just reaches a boil. Remove from heat and add 1 tbl of the espresso extract and the liqueur.

Making the filling/frosting: Whisk the mascarpone, sugar, vanilla, and liqueur in a large bowl until blended. In a stand mixer whip the heavy cream until it holds peaks. Add a spoonful of the whipped cream to the mascarpone mixture and stir until combined. Carefully fold in the rest of the whipped cream so it is light and fluffy. [This mixture as it is will be used as the filling, and along with the addition of more coffee extract is used as the super delicious and creamy frosting]

Assembling the Cake: (Aren't you exhausted just from reading all these instructions??) On one of the layers of cake soak the top with the espresso syrup. (When I was making this I was kind of scared of the syrup, mostly because I used cinnamon schnapps...don't judge me, but this really should be 1/3 of the entire amount of syrup). Smooth about 1 1/4 c. of the filling on top of the cake layer and press chocolate into the frosting. Then, soak the bottom of the top layer of the cake and press the soaked side of the cake onto the frosting (a soaked cake sandwich if you will!). Then use the rest of the syrup to soak the top of the cake. Take the rest of the filling and add the rest of the espresso extract to taste. (I'd like to take this moment to talk about how much I loved this frosting. I could put chocolate chips in it and dip a sugar cookie in it and eat it every day for the rest of my life and be totally happy.) Use this frosting to frost the top and sides of the cake. Refrigerate this cake for at least 3 hours, but preferably up to a day. Dust with cocoa powder shortly before serving.

Enjoy!

-D

Tuesday, June 2, 2009

Hot Dog! The Mickey Cake


This weekend I spent a lot of time with a few close friends: Mickey, Minnie, Donald, Daisy and of course, Goofey. Contrary to first thought, I did not take a trip to Disneyworld, although I would love to take a spin in those teacups again. No, I actually was busy in the kitchen making a cake for my niece's 2nd birthday this month. Her current choice of tv shows is Mickey Mouse Clubhouse, so naturally this was the cake theme. By the end of the weekend I, like her, could sing almost every song on the show. Go ahead and read on.

This was a marathon in the kitchen. It took me a whole day to make this cake, baking, rolling fondant, fast forwarding and rewinding Mickey Mouse Clubhouse to see the details. The inspiration for this cake came from Cake It or Leave It, a site with a plethora of cake pictures, all of them amazing. I followed the basic design but made changes as I went along. Here we go:

I started the day before making a few fondant shapes that needed to be stiff to stand up on their own.


I used a chocolate butter cake mix and made two 10 inch cakes and two 8 inch cakes for the layers. In between I used a basic buttercream filling.


Covering the cakes in fondant proved to be the hardest part. You have to work fast and also make sure its not ripping or buckling or basically turning into a nightmare. I would say the more you work with fondant the easier it is, but the first few times is definitely an experience you won't forget. I hadn't worked with fondant in about a year, so it took me a few minutes to get in the swing of things.


After covering the cakes, which brought me to about lunch time, it was making fondant shapes for the rest of the day and donning the cake with them. Here it is almost complete:


And here is Mickey, front and back, with all of this friends, loving life on the top of my little niece's cake:


Enjoy!

~T

Tuesday, March 17, 2009

The South meets New York


Meet a little thing called perfection...

...Red Velvet Cheesecake.

A few weeks ago I found this dream come true recipe from Southern Living magazine. It was almost as if a genie in a bottle granted me a wish to combine two of my most favorite desserts: the beloved Red Velvet Cake with the rich and famous Cheesecake. The result? Read on to see.

My first thought when I saw that Red Velvet Cheesecake even existed was that it was probably just plain cheesecake with a little red food coloring added in. Boy was I wrong. This is the real deal. The recipe combines classic ingredients from each dessert. Here’s the recipe from Southern Living with a few adaptations:

Red Velvet Cheesecake

1 ½ cups chocolate graham cracker crumbs
¼ cup butter, melted
1 tbsp granulated sugar
3 8oz packages of cream cheese, softened
1 ½ cups granulated sugar
4 eggs, lightly beaten
3 tablespoons unsweetened cocoa
1 cup sour cream
½ cup whole buttermilk
2 tsp vanilla extract
1 tsp distilled white vinegar
2 1oz bottles red food coloring


After making a trip to the grocery store, I had already run into a road block. Chocolate graham cracker crumbs? I guess not. I could not find these anywhere. Well, I couldn’t find them in the 2 stores I looked. So I moved on and bought chocolate sandwich cookies (aka Oreos) and scraped out the middle to get the base for my crust.


After that small issue, I was on my way.

Mix together the cookie crumbs, melted butter and 1 tablespoon sugar into the bottom of a 9 inch springform pan. Press mixture into the bottom of the pan to create the crust. I used the bottom of a drinking glass to make sure it was even.


Beat cream cheese and 1 ½ cups sugar together in a Kitchen Aid mixer for 1 minute. Ok, it doesn’t have to be a Kitchen Aid, but if you haven’t made the switch, you’re missing out. It will change your life.


Add eggs and next 6 ingredients. Mix on low until combined. You'll end up with a velvety smooth beautifully red mixture.


Pour batter into crust. Bake at 325° for 10 minutes. Reduce heat to 300° and bake for 1 hour and 15 minutes or until center is firm. My cheesecake took about 20 extra minutes for the center to set.

Turn the oven off. Let the cheesecake stand in the oven 30 minutes. Remove from oven and cool on a wire rack for 30 minutes. Here's what came out of my oven.


Cover and chill 8 hours.

The recipe tops off the cheesecake with a traditional cream cheese frosting. But beware – without frosting the cake was already incredibly rich with the perfect combination of sweet and tart. Personally, I think this cheesecake can stand alone without anything on top. The choice is yours! And really...you can’t make a bad decision here.


Try this! You and yours will love it, I promise.

~T


Friday, March 6, 2009

Happy Birthday Dr. Seuss!


In honor of Dr. Seuss' 100th Birthday last week, I was asked to make a few cupcakes for a special first grade class. What better way to celebrate this famed author than with little crazy cakes, each one unique.

Dr. Seuss was no traditional author, so these cupcakes were destined to be different. For simplicity's sake, this time I used a plain white cake mix and then kicked it up a notch by adding blue food coloring. 20 drops to be exact. Right out of the oven the blue was peeping through the top.


Let me introduce you to one of my favorite friends:


Written by Alan Richardson and Karen Tack, this book is simply delicious. After receiving it from a friend, I have used it too many times to count. One recipe in particular stole my heart from the beginning: the Almost-Homemade Vanilla Buttercream. A combination of all good things, this icing has it all: marshmallow fluff, butter, powdered sugar, and vanilla.


A little piece of heaven...


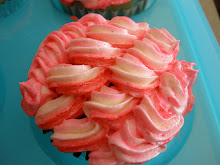
I added a little red food coloring to dress up the icing, and done! Cupcakes that even Dr. Seuss would be proud of.


Happy Baking!

~T
 
Blog Design by Delicious Design Studio